Configuring Change Management
DEVELOPER
Configuring Change Management |
DEVELOPER |
You must initialise Change Management before you make use of it. The initialization process starts by creating an empty folder in your local drive to store the shared data where the software development takes place.
All PROIV bootstrap folders must be version 8.0 or higher. The product is not compatible with earlier versions of PROIV.
All PROIV bootstrap folders to be managed must have been logged into at least once (in order to complete the initialization of PROIV Developer).
All PROIV bootstrap folders to be managed should have the same operating system permissions. This requirement also applies to the folder that is defined as the repository of the ‘shared data’ and also the one that will be used for Change Management export files.
You must create two blank folders in your local drive; one to hold the shared data and the other to hold the exports, before you initialize Change Management. |
To enable Change Management:
Login to PROIV Developer.
Click Change Management
![]() .
.
The Change Management
window appears.
To enable Change Management, click Enable CM.
In the Current Region box, enter the free text description of the source code development folder.
In the CM Data box, browse and select the fully qualified shared data folder from your local drive for the use of Change Management. The folder must exist and should have suitable read and write permissions.
Click OK.
A warning message appears to specify that you cannot modify the Current
Region and CM Data Area subsequently as these are the initial configuration
for Change Management.
Click Yes
to proceed with CM setup.
The Change Management is initialized and is ready to be configured.
 |
|
|
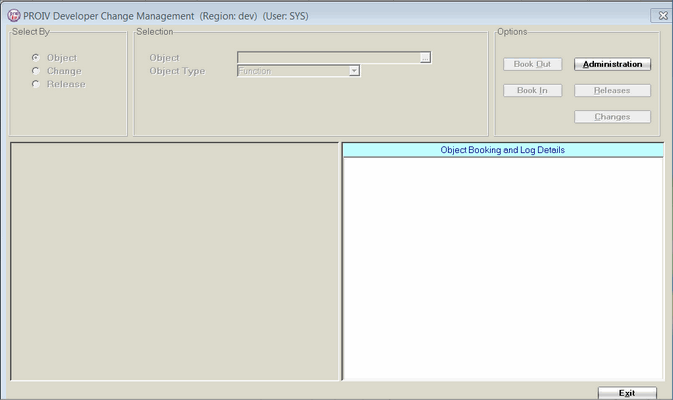
Note: Currently, the Administration option is enabled. The other options are enabled when the configuration phase is completed. |
Click Administration.
|
Note: The Objects, Reallocate and Affected tabs are enabled only when the configuration is completed. |
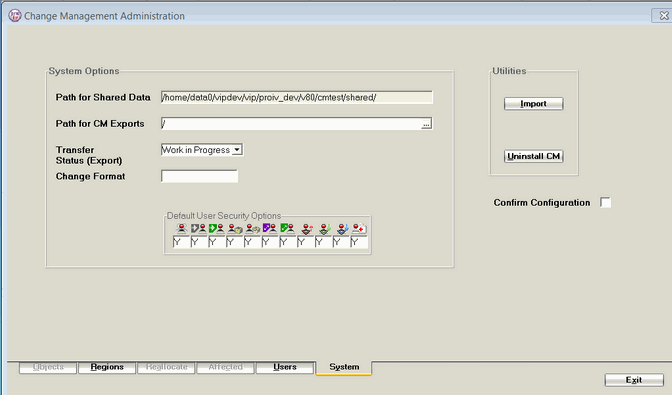
Click System tab.
In the Path for CM exports box, enter the path. The export folder or directory needs to exist (with read/write permission set appropriately) before the configuration is confirmed. It should be empty at this point. It is not mandated that this folder/directory is used exclusively for CM exports but it is strongly advised that being the repository for CM export files is its sole purpose.
On the Transfer Status (Export), select either:
Work in Progress: Signifies when a ‘Release’ is migrated then the objects contained within it cannot be modified until they have been migrated to a region that makes objects available once imported.
Available: No restriction is applied to any of the objects.
In the Change Format box, define an (optional) format for Change Numbers by means of a simple pattern match. For example, NNN; N - Numeric, AAA - Alphanumeric.
In
Default User Security Options, you can set
up the security options for the users as in the following table:
Option |
Role |
|
Y: the user is a Change Management Administrator. N: the user cannot access the Administration console. |
|
Y: the user can maintain releases. N: the user cannot access the Release Management console. |
|
Y: the user can approve or unapprove releases. N: the user cannot approve or unapprove releases. |
|
Y: the user can export releases. N: the user cannot export releases. |
|
Y: the user can import releases. N: the user cannot import releases. |
|
Y: the user can maintain changes. N: the user cannot maintain changes. |
|
Y: the user can approve or unapprove changes. N: the user cannot approve or unapprove changes. |
|
Y: the user can book out items. N: the user cannot use the Book Out options. |
|
Y: the user can book in objects. N: the user cannot use the Book In options. |
|
Y: the user can book in objects for other users. N: the user cannot book in objects for other users. |
|
Y: the user can restore old versions. N: the user cannot restore old versions. |
To add a new region in addition to the
current region, click the Region
tab.
The Region tab appears. This is where the bootstrap folder/directories
to be controlled are defined. See Defining
a Region for more information.
Select
the Confirm Configuration
check box and click OK.
Change Management is configured. This is a fixed configuration and
you cannot modify.
|
This is one time process to configure Change Management that helps to manage the software development environment. The Objects, Reallocate and Affected tabs are enabled on confirming the configuration. |
Topic ID: 550096