Importing Non-Source PROIV objects |
DEVELOPER |
Importing Non-Source PROIV objects |
DEVELOPER |
The Non-Source Import utility allows you to import PROIV objects that are not source code objects (such as functions, global logics etc).
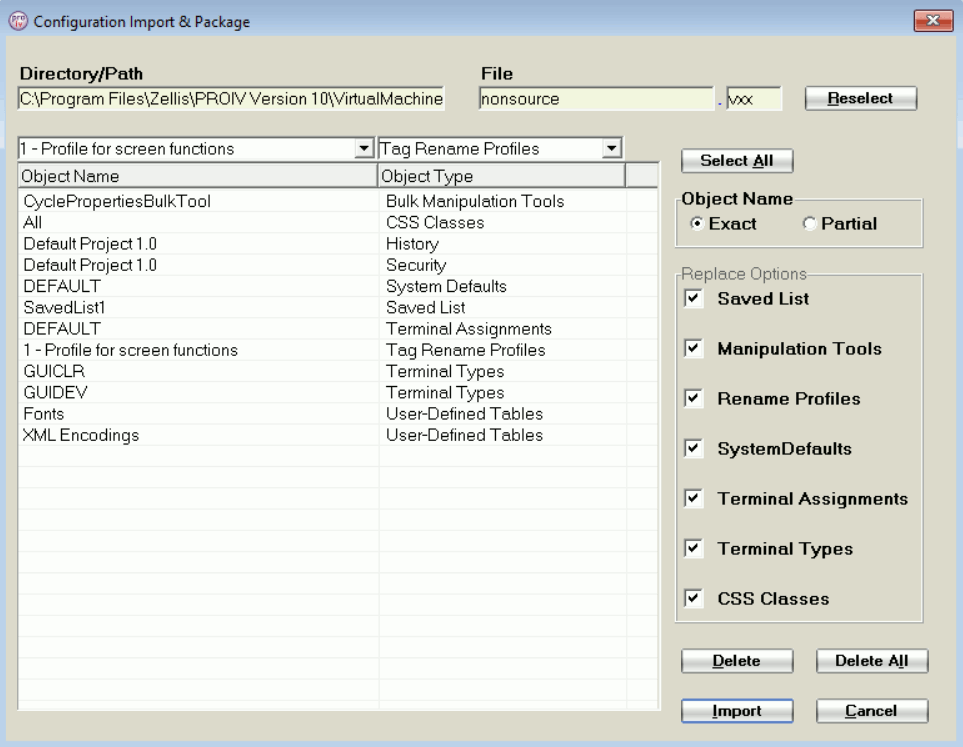
The objects that can be imported are: PROIV Developer Project Security, Saved Lists, Bulk Manipulation Tools, Tag Rename Profiles, User Defined Tables (i.e. colors, fonts, XML encodings), System Defaults, Terminal Types, Terminal Assignments, CSS Classes and History (of source code objects that have been added, deleted, maintained). You can export these objects individually as selected from a list or typed in, or perform a partial selection for a type (e.g. all Saved Lists beginning "Function").
Import Mechanism:
Navigate to the folder you wish to the Non-Source import file from. The combobox to the right will default to the object type "Security" but you can select any of the types that you wish to import by turn. The combobox to the left will offer all the objects for the type selected for you to pick from. As they are selected the listbox below the two comboboxes will be populated. If you wish to perform partial name selections simply select the option in the "Object Name" radiogroup. If you wish to select all the objects in the file then click the "Select All" button. Once you are satisfied with your selections then click the "Import" button and the selected objects will be imported from the file name you have chosen.
Click the Tools tab, on the System Administration Tools, click Import.
The Non-Source Import screen appears.
To select the objects for import, do either of the following:
To select all objects, click Select All.
The import list loads all the objects of the imported file.
To select individual objects, click the check box of the respective objects, as required.
|
Note: If any objects cannot be imported (for example, the object already exists and the replace option has not been selected), they are placed in the failures list. At the end of the import process, the list of failed objects appear, which you can optionally print. |
|
Field |
Description |
|
|
Directory/Path |
For a clean installation, by default, the PROPATH directory appears. The value in this field determines the configuration which is set in the Default Paths. You can also browse and select the file or folder as required. The list of objects appear under Object Names. |
|
|
Archive |
Represents the name of the file which is to be imported. |
|
|
Default Import Options |
Displays a list of objects which you can choose to replace and include into the import list during the import process.
|
|
|
Delete |
Deletes the selected objects from the list. |
|
|
Delete All |
Deletes the list. |
|
|
Details |
Displays list of objects which are imported. |
Click Import.
The Import process completes and a message appears to indicate success or failure.
Topic ID: 870339